Set sizes (Bulk)
Notes:
- Size scales of the inherited catalog articles should always be the same or within the range of the size scales set for the master catalog articles. If you are importing size scales for master catalog articles that will cause the size scales of the inherited catalog articles to be out of range, T1 will automatically set the size scales of the master to the inherited catalog articles.
- For inherited catalogs, imported size scales can either be the same or a subset of the master catalog size scales.
After importing size scales on the seller level, you can set those size scales to articles using the Import function.
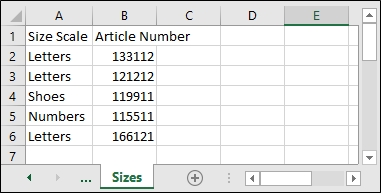
Make sure to have the articles listed in an Excel sheet with the following columns: Size Scale and Article Number, as shown in the below example:
To import a file with size scales of articles, follow these steps:
- Click the Import button, the following window appears:
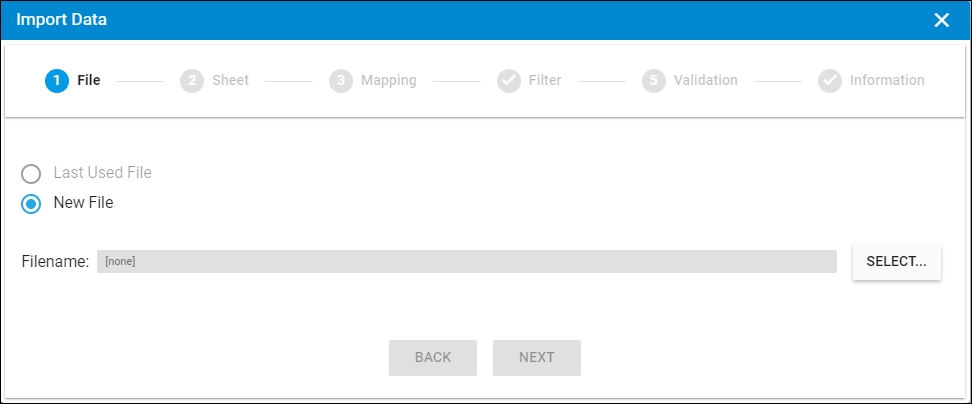
- Click Select to browse for the file you want to import,
- Select the file then click Open, the name of the file you selected appears in its field as shown in the below example:
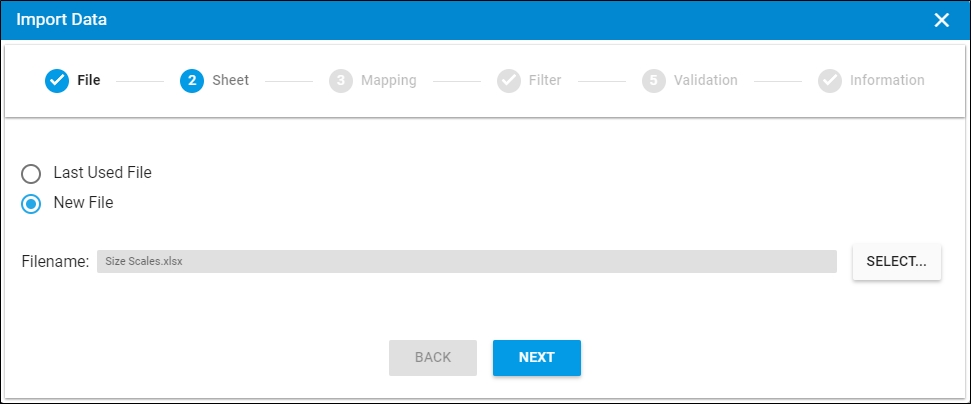
- Click Next, the following window appears:

You can click Back to return to the previous window.
- Select the sheet you want from the dropdown list in case your Excel file contains more than one sheet, then click Next, the following window appears:
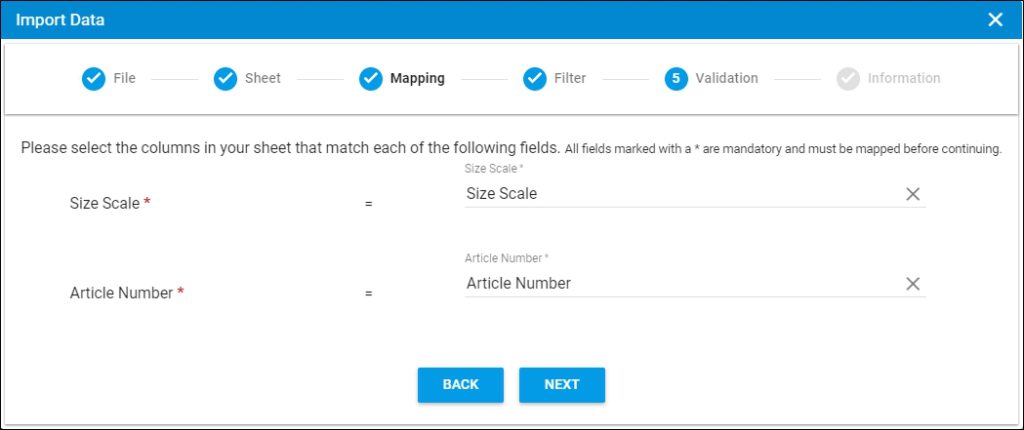
- Select the column of the sheet that matches each field, then click Next, the following window appears:
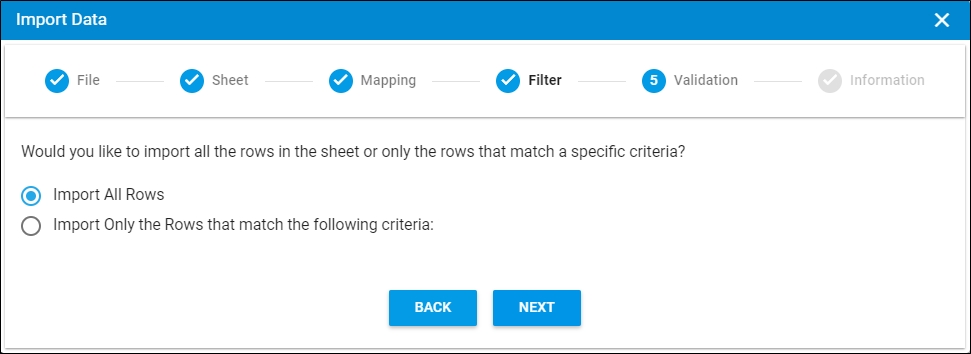
- Click the radio button next to the import method, either all rows or rows that match certain criteria, a validation window appears informing you if records are valid or not, if not, you need to fix the sheet then import the file again,
- Click Next, the following window appears:
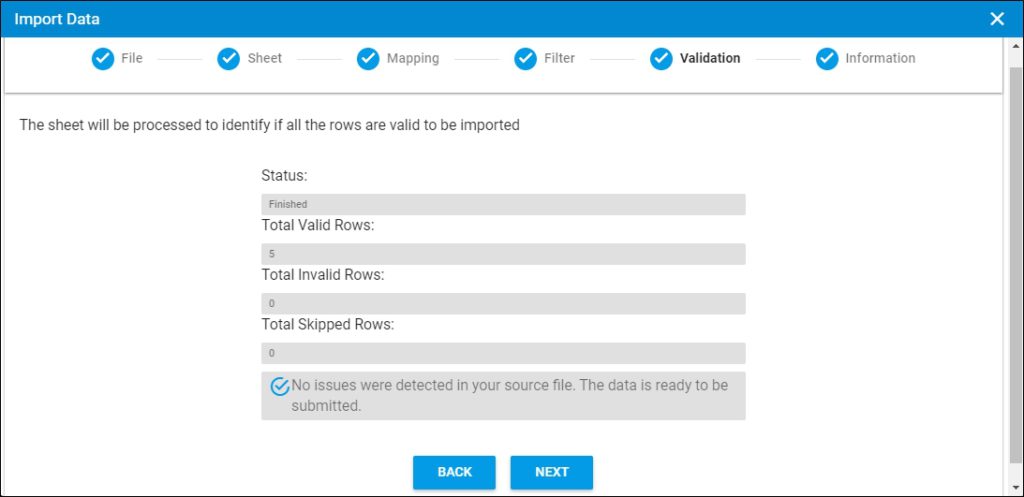
The validation window shows the status of the import process, the total number of valid rows, and the total number of invalid and skipped rows. The above example shows that all the rows are valid.
If there is an error in the sheet you are trying to import such as empty size scale, the validation window will show an error. Make the necessary changes and import the sheet again by closing the import dialog and clicking the Import button then continue with the steps mentioned above.
- Click Next, the following window appears:
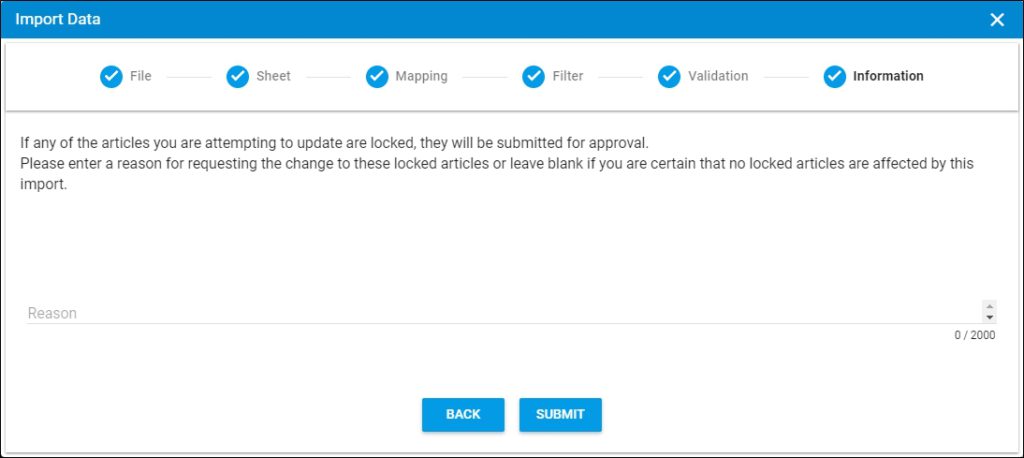
If any of the articles are locked and the “External Change Management” flag is not activated for the catalog, you need to enter a reason for size change then click Submit. While if the “External Change Management” flag is activated, then locking at least one article will prevent changes to prices and sizes of the whole catalog articles. These changes will be managed through an external system and not through T1. Please note that this flag is managed by the Trasix Support team.
- Click Submit, the progress is displayed,
- Wait until the job is finished, sizes are added to each article and you can view them by going to the Sizes tab for the article you want, the list of sizes appears as shown in the below example:
You can also view sizes in the “Sizes” module.
Notes:
- If changes are not reflected on the page, refresh the browser by pressing F5.
- If any of the records are invalid, you can skip them by clicking the checkbox next to Skip invalid rows as shown in the below example:
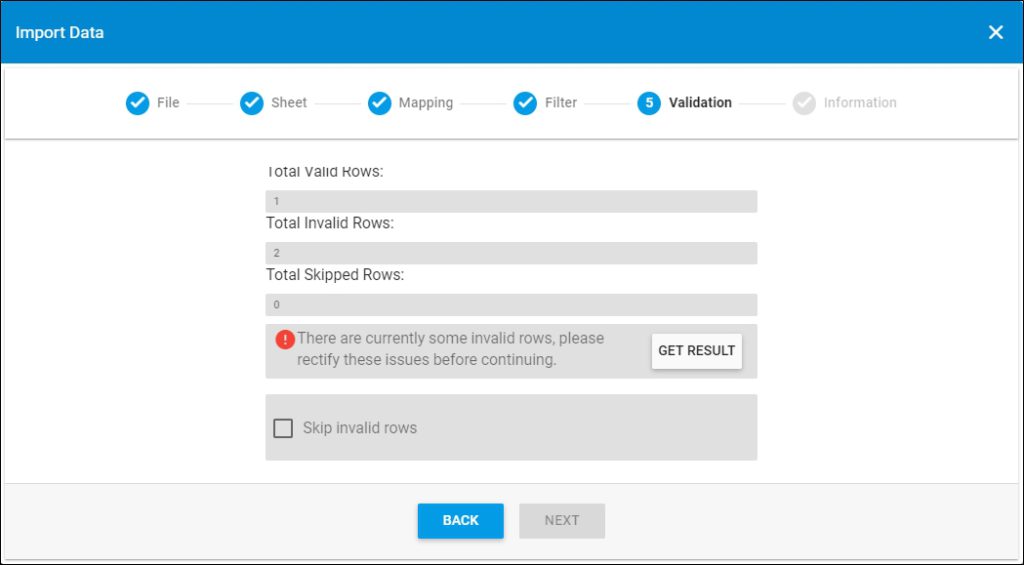
The Next button is activated, and you can import the valid rows.